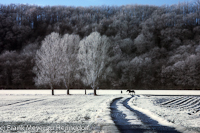
 I have been curious about infrared photography for years, and have even tried it several years ago, using my first digital camera ever, an Olympus 3030. The outcome was rather disappointing: Long exposure times that made shooting without a tripod rather unpractical, and the desired effect was barely visible.
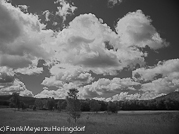 On the right is a picture that I took in Williamstown with this technique. With a little bit of phantasy, one can recognize the “bright” grass and leaves, and the dark sky indicative of IR photos.
That the outcome was so disappointing was of course not surprising: while the sensors in the digital cameras are sensitive for near-infrared light, there is usually a IR-cut filter in front of the sensor to have the camera detect only the visible part of the spectrum. If you add an IR filter to the camera, then the transmission curves of the IR filter and the IR-cut sensor filter superpose, and in the extreme case no light gets through to the sensor whatsoever. Long exposure times and disappointing results are then to be expected.
I dropped the topic, got a new digital camera (a Canon D30), and happily shot regular images for about 10 years. Then it was time to replace the old 3 MP camera with a newer model. I purchased a Canon D7 and tried to trade my old D30 in. However, the dealer told me that it was pretty much worthless and he didn’t want to have it. In times when you can buy a simple 12 MP SLR for EUR 300, who would spend money on a 10 year old 3 MP camera? So I ended up with two cameras: the new, nifty D7, and the old, still functioning D30. And that was when I remembered the IR Photography topic…
If one pokes around on the web, one finds an amazing amount of stunning IR Photography. If one then looks at the details, one finds that most of the pictures have been taken with “converted” cameras. Remember the sensor filter issue from above? If one was able to remove the IR-cut filter from the camera and replace it with an IR filter, then the camera would be perfectly suited to take IR photos. However, changing the filter in front of the sensor has something of “open heart surgery” and, if done incorrectly, will render the camera entirely useless. But what did I have to loose? The camera wasn’t worth anything anymore anyway, and I thought that I might as well try.
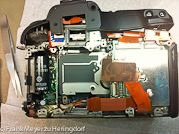 If one goes hunting for IR filters and camera conversions, “lifepixel” comes up as a hit. Lifepixel (http://www.lifepixel.com/) sells custom fit filter replacements for digital camera sensors, and they even have instructions on how to do the modification. So I purchased an IR filter from them (the filter being worth more than the camera at this point), and started taking the D30 apart. The image above on the left shows the D30 pretty much disassembled. The sensor has been removed, and you can see the shutter curtain. Fortunately, the filter was in a separate housing, so I could remove the filter housing from the camera, then store the camera in a dust-free environment and attend to cutting the filter from the housing.
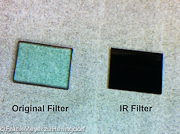 Here is an image of the original IR-cut filter that I removed from the camera and that is transparent to visible light, and the replacement IR filter, that is not transparent to visible light and appears dark in the image. I glued the IR filter to the housing and put everything back together, hoping that the focus of the camera would still be in order. Why focus? Well, maintaining the focus during conversion is one of the biggest issues: In an SLR (without using LifeView or any equivalent), the focus is measured using a separate focus sensor that rests in the bottom of the camera. Light that falls in through the lens is divided by the main mirror into two parts: One part goes up to the viewfinder and is used by the photographer to frame the image, the other part falls on a little mirror, hidden behind the main mirror. This light is reflected downwards, and hits the dedicated focus sensor and light meter. When the camera adjusts its focus, the lens is shifted until the focus sensor claims that the image is properly focused. If one then takes an image, the CCD image sensor needs to have the exact same distance from the mirror that the focus sensor has, otherwise the camera thinks that the image is focused when it actually is not. For a typical situation with a 50 mm lens and an object distance of about 5 m, putting the sensor in the wrong position by the thickness of a hair will shift the focus point by about 2 m. So one has to be careful and make sure that the image sensor is in the correct place. Luckily, the makers of the camera were aware of this problem. First they made sure that it is easy to put the sensor into the right position, and then there is an adjustment screw that allows to shift the main mirror so that it can be adjusted to have the same distance to image sensor and focus sensor. Anyway, focus is in my opinion the most crucial point of the conversion. With this in mind I reassembled the camera and then took the first images. And the focus was correct! And the camera could see IR!
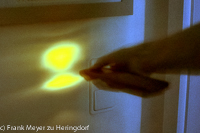 See me in the picture here using a remote control as a flashlight! The picture is so dark because the entire room was dark, and the IR light was so bright that it is almost overexposed in the image. This image was taken freehand, with an exposure time of 1/5 s. Pretty good for a dark room, isn’t it?
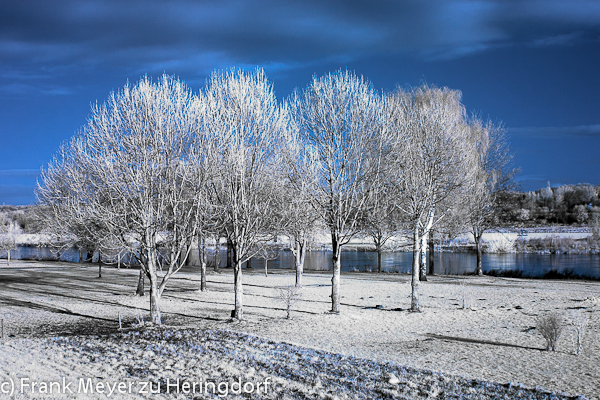
Very eager to see the white leaf effect I went outside and started taking images. These first images were still a little disappointing, though, since it was a grey and rainy day. But when I went out into the sun a few days later, I was very happy with the outcome (see below). It has been raining ever since, and I am still waiting for better weather – and for the spring, of course, when leafs on the trees will enhance the wood-effect and will hopefully produce more interesting images.
Disclaimer: If you stumbled across this page and decided to convert your camera as well, either based on the experiences outlined here, or based on the descriptions made, you cannot hold me liable if anything goes wrong. Be warned that any attempt to modify your camera can destroy the camera permenantly. This is not my fault. The link to lifepixel is an external link, and I am not responsible for content found on the lifepixel site, nor for links that can be found on the lifepixel website.